For our customers who’d like to integrate an animated character into their static content – such as e-learning lessons or marketing materials – we offer the ability to output your avatar’s “scenes” as transparent WebM video or MP4.
You can use these videos as-is on an HTML page (such as a lesson in your Learning Management System (LMS)). You can also convert them to be embedded in other programs (such as Microsoft PowerPoint) or to edit them with more advanced video software (such as Adobe Premiere).
About WebM Video #
WebM Video is a royalty-free HTML5 video format optimized for the Web and supported by all major browsers (Safari 14.1 added native support for WebM, and all later versions support the format).
WebM has several benefits:
- It’s supported by all of the major browsers
- It offers high-quality, web-optimized video with small file sizes
- It supports transparent backgrounds, so you can put your videos over other visual elements or in designed backgrounds
Background #
You can upload a .bmp, .gif, .jpg, .webp*, .apng or .png file to create a static background for your video output.
Use permanently #
Select Use Permanently to apply a static background when generating a video.
Trigger in response #
Insert the SSML Tag into the text in the script window to trigger background changes in the avatar response when generating a video. Use Preview Scene to test the result.
To insert the image into the script, place the cursor at the desired location in the text before selecting Upload. After selecting the image and the Trigger in Response option, the SSML Tag is added to the text.
Delete #
If a permanent background is assigned, a Delete option is available to delete the background image. To remove an image added with Trigger in Response, remove the tag from the script window.
Animation Tag #
Gestures can be added to your conversation for video generation. Make sure there is enough time during the script for the avatar to execute the gesture. Use the rate SSML tags to add pauses or slow down the speech if needed.
- Create your response text in the Script text area
- Place your cursor at the point in your conversation where you want to insert your gesture
- Click “Insert.”
- To see the gesture(s) in the context of your conversation, click the “Render Scene” button.
- If you want to preview a gesture before adding it to your response text, select the gesture from the pulldown and click the “Play” button.
SSML Tag #
Speech Synthesis Markup Language (SSML) tags available for your conversation.
Not all SSML tags are supported by all voices. We work to maintain a list of the supported tags for each voice but there can be gaps as services change. If a SSML tag is encountered that is not supported, the tag will be removed during the voice generation.
Supported SSML tags for Polly voices can be found here.
Supported SSML tags for Azure voices can be found here.
Tips:
- The language SSML tags work in conjunction with the Character voice. For example, to use the Mexican Castilian accent SSML tag, make sure you have selected a Mexican Castilian voice on the Character page.
- The drop-down menu selections for Prosody rate are slow, medium, etc. Prosody rate can also be expressed as a percentage and give more control over the results. A negative percentage slows the voice. A prosody rate of 0% is the default rate, 10% is faster and -10% is slower. The higher the percentage the greater the rate change.
- When using the phenome tag to control pronunciation, look up the word or a similar word in an online dictionary and copy the pronunciation into the tag.
- Create your response text in the Script text area
- Place your cursor at the point in your conversation where you want to insert an SSML tag.
- Click “Insert.”
- To hear the impact of the SSML tag in your conversation, click the “Render Scene” button.
Emotion #
Emotion can be added to the voice as the avatar speaks the text in the script.
- Create your response text in the Script text area
- Select the portion of the conversation where you want to apply an emotion tag.
- Click “Insert.”
- To hear the impact of the emotion tag in your conversation, click the “Render Scene” button.
Script #
Enter the text into the Script box that will have tags entered into it.
Advanced Configuration #
Resolution #
Enter the width (x) and height (y), in pixels, for the video you’d like to create.
Camera #
Think of this camera as a satellite orbiting the earth. Its position relative to the target (“Earth”) can be set by three parameters: alpha (the longitudinal rotation, in radians), beta (the latitudinal rotation, in radians), and radius (the distance from the target). Adjusting these values changes the perspective from which the user views the avatar. You can adjust them by changing the values in these fields, or you can click and drag on the avatar below to adjust the alpha and beta values and scroll your mouse scroll wheel to adjust the radius to achieve the desired camera angle and distance you desire.
- Alpha – rotation about the Y-axis.
- Beta- rotation about the X-axis.
- Radius – the distance between the avatar and the camera.
- Target-The target is the focal point around which your camera rotates. 0, 0, 0 represents the center of the screen. You can change this point by adjusting these three values manually, or you can right-click and drag on the avatar below to adjust these values automatically.
Scroll Wheel – zooms scene in and out.
Left Mouse Button – press and hold to rotate scene.
Right Mouse Button – pan scene.
The values are saved automatically.
The resulting values can be copied from Character/Camera and Loading Image Config and pasted into the settings for another avatar.
Reset Camera #
Click here to reset the camera to its default position. This resets the Alpha, Beta, Radius and Target values to their default settings.
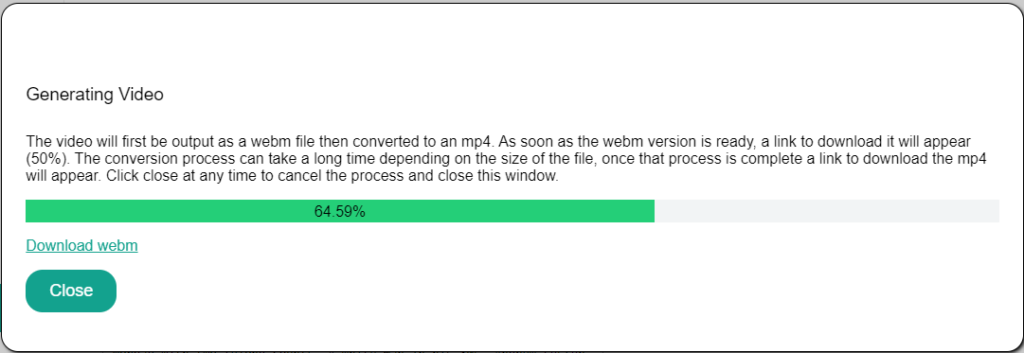
Render #
Videos can be rendered in WEBM or MP4 formats.
Play #
Preview Scene prompts the avatar to recite the script content including specified gestures.
Return to Portal #
To return to the other CodeBaby portal functions, select Return to Portal.


